Sign up for NoteLedger, verify your email, and complete the welcome wizard so you can start tracking your mortgage note portfolio — the whole process takes about five minutes.
Visit the sign-up page
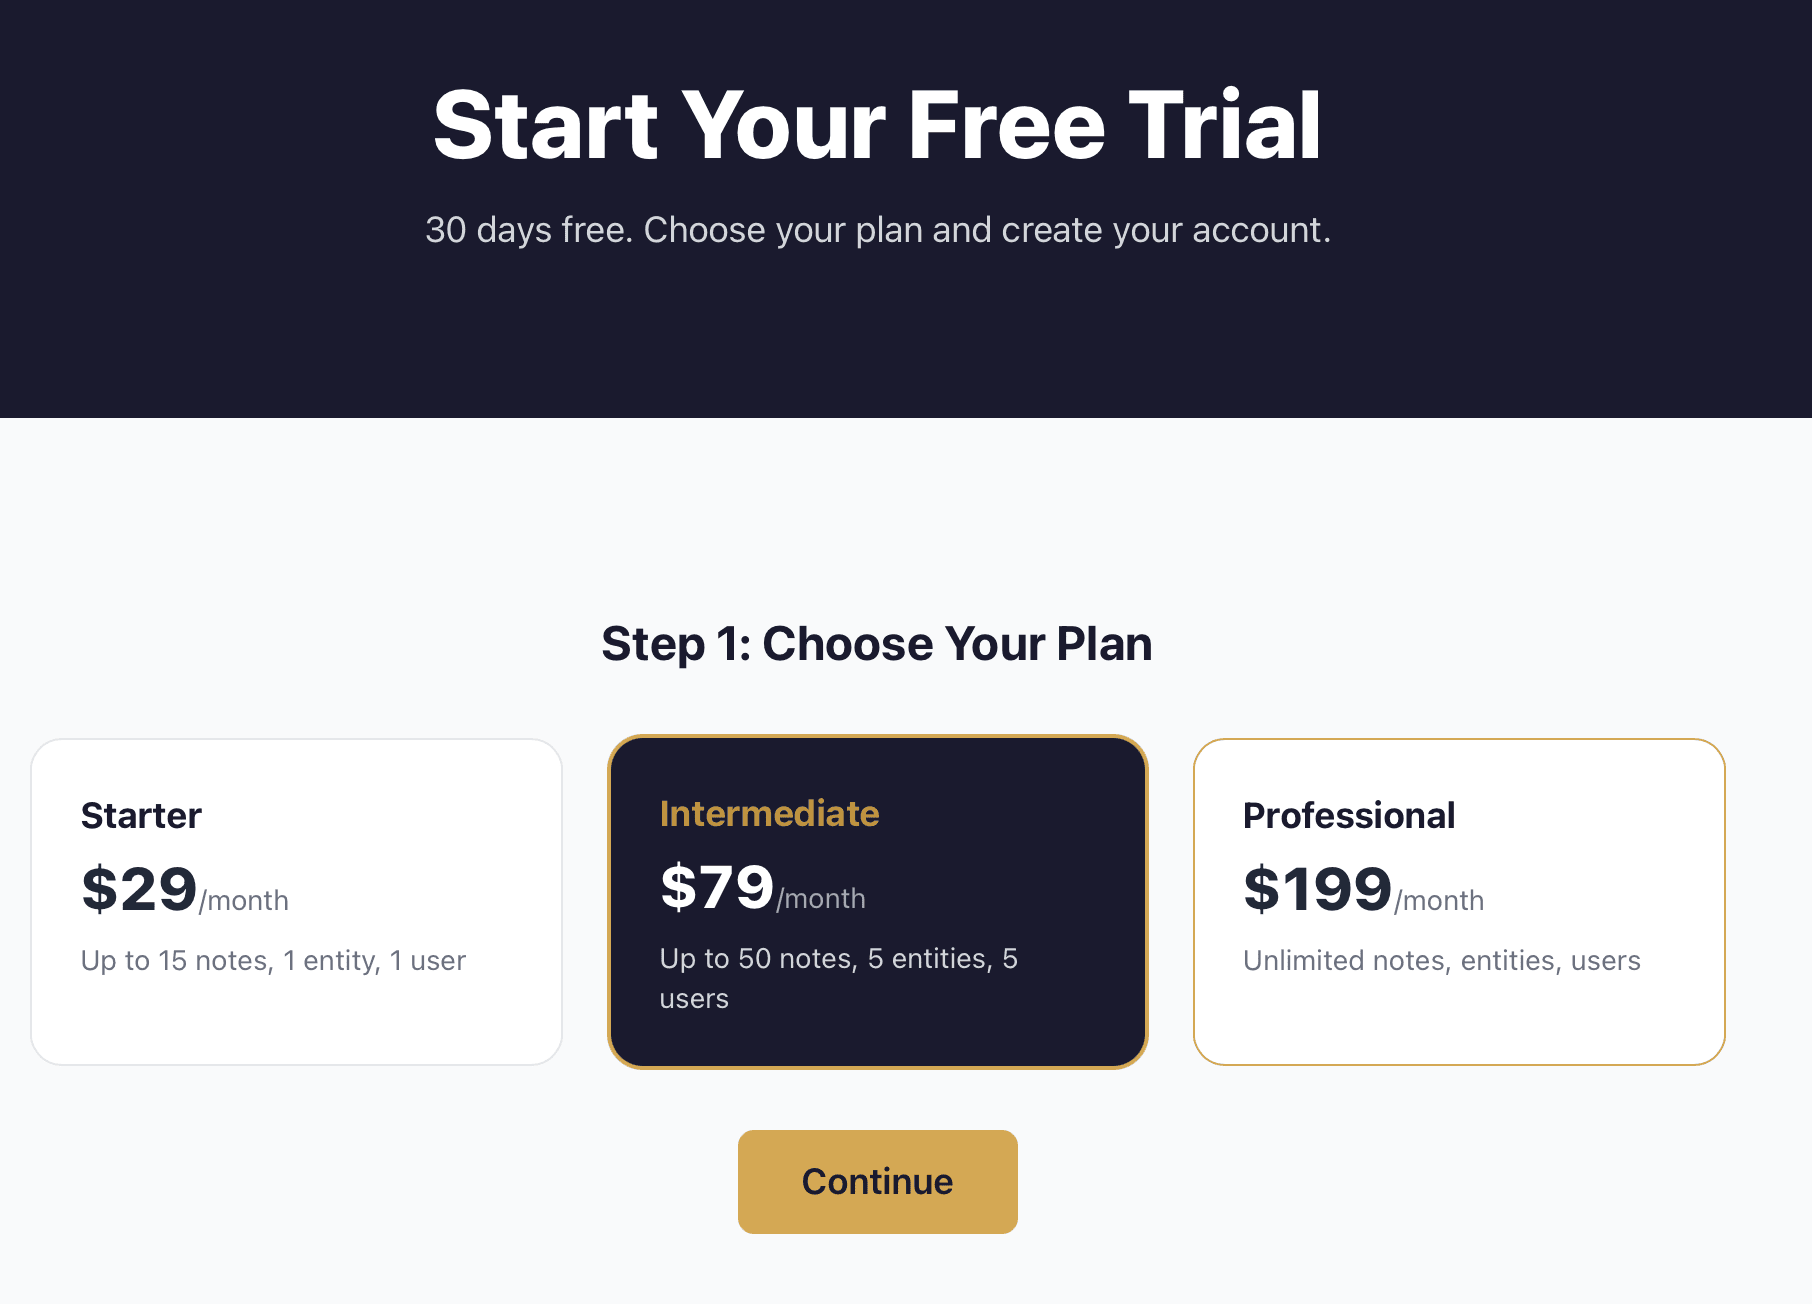
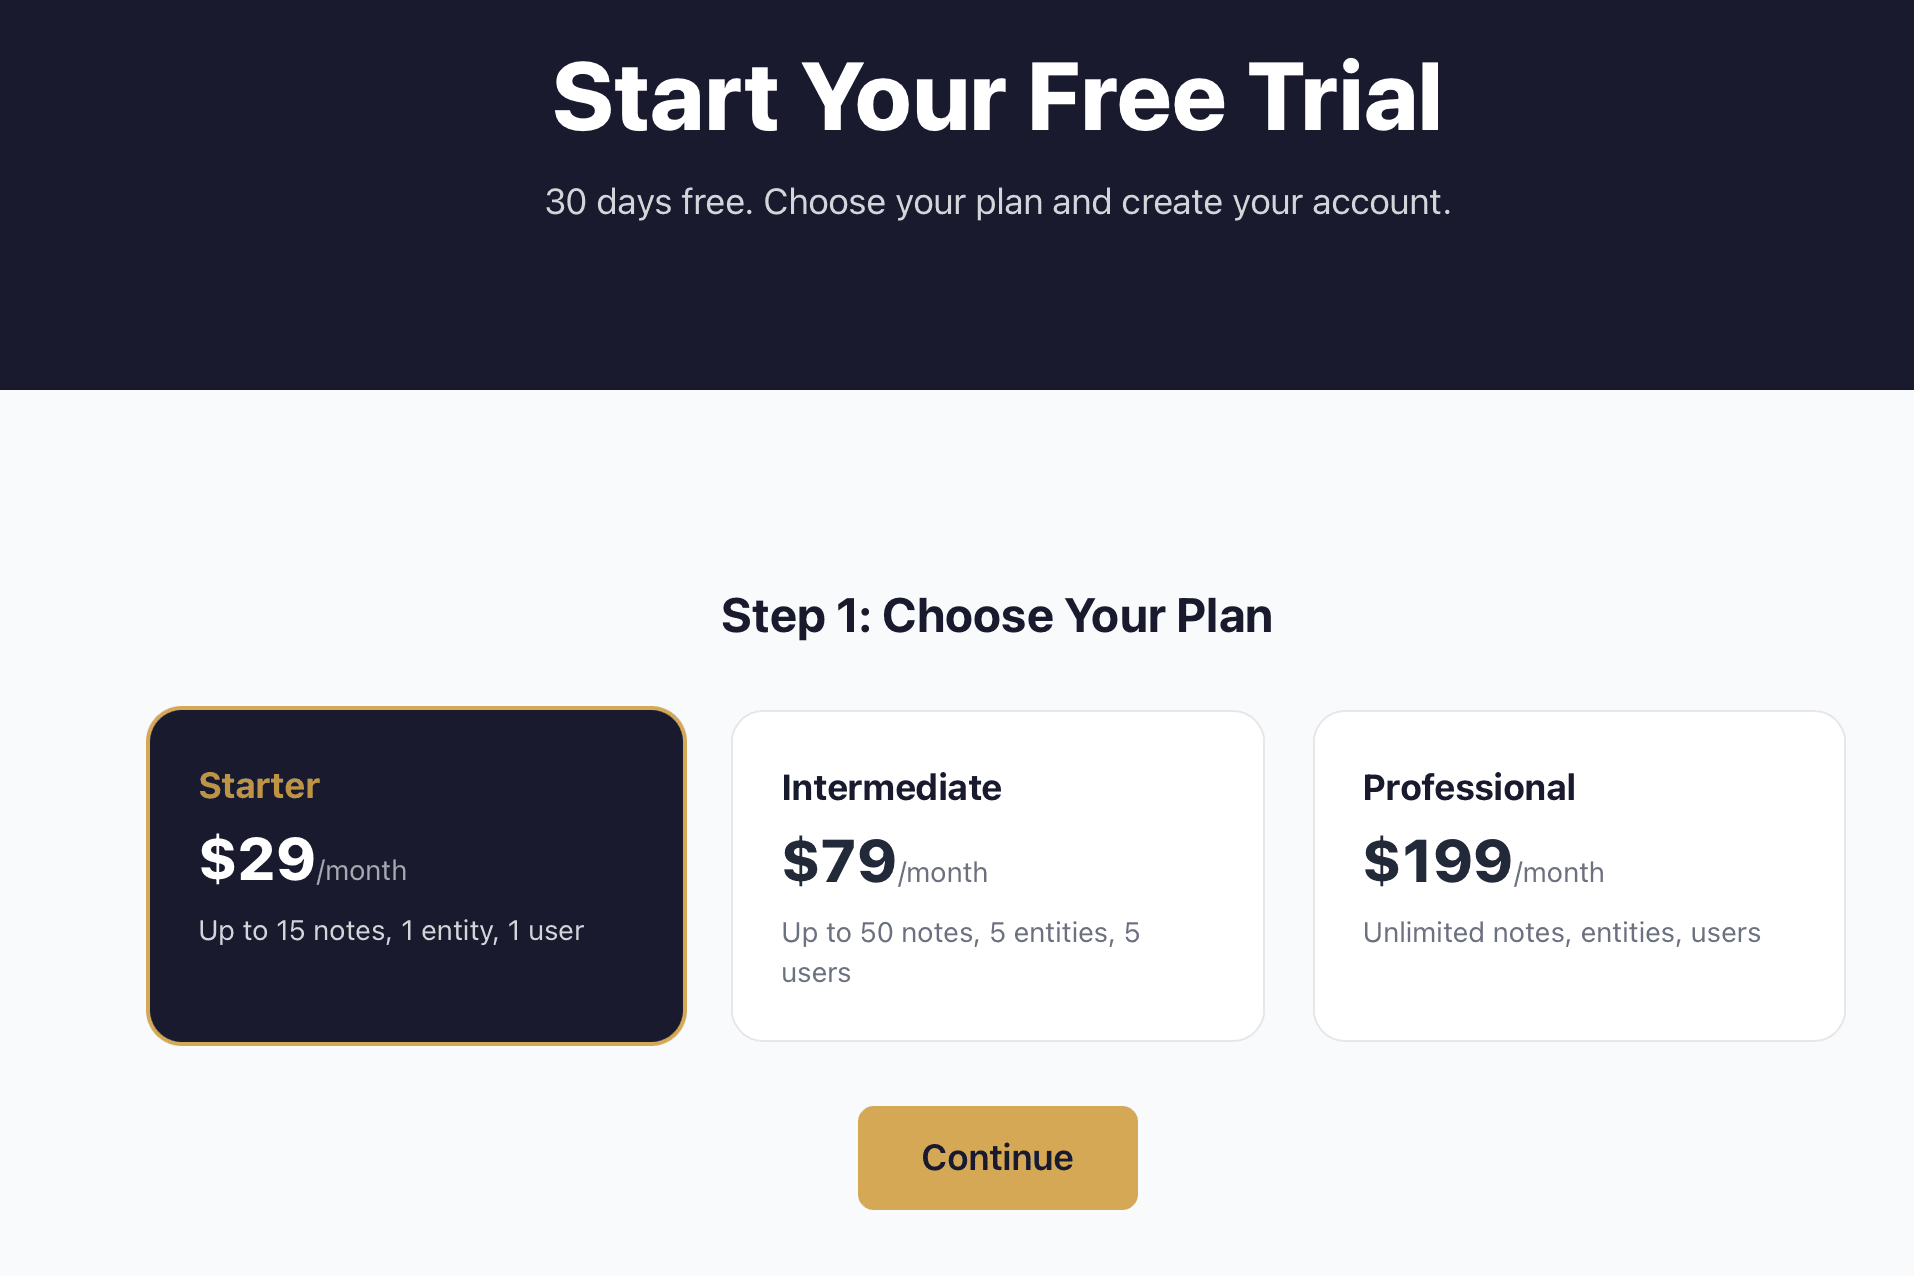
Go to noteledger.io/signup. You will land on the sign-up page, which shows the three available plans.
Choose your plan
Click the plan card that fits your portfolio size. The three options are:
- Starter — $29/month, up to 15 notes, 1 entity, 1 user
- Intermediate — $79/month, up to 50 notes, 5 entities, 5 users
- Professional — $199/month, unlimited notes, entities, users
The selected plan card becomes highlighted. When you are ready, click Continue.
Fill in your account details
You are now on the account details step. Complete the form:
- Full Name (required) — your full name
- Email (required) — the email address you want to use to log in
- Company Name — your LLC, trust, or fund name (optional)
- Phone — optional
- Street Address, City, State, ZIP — optional company address
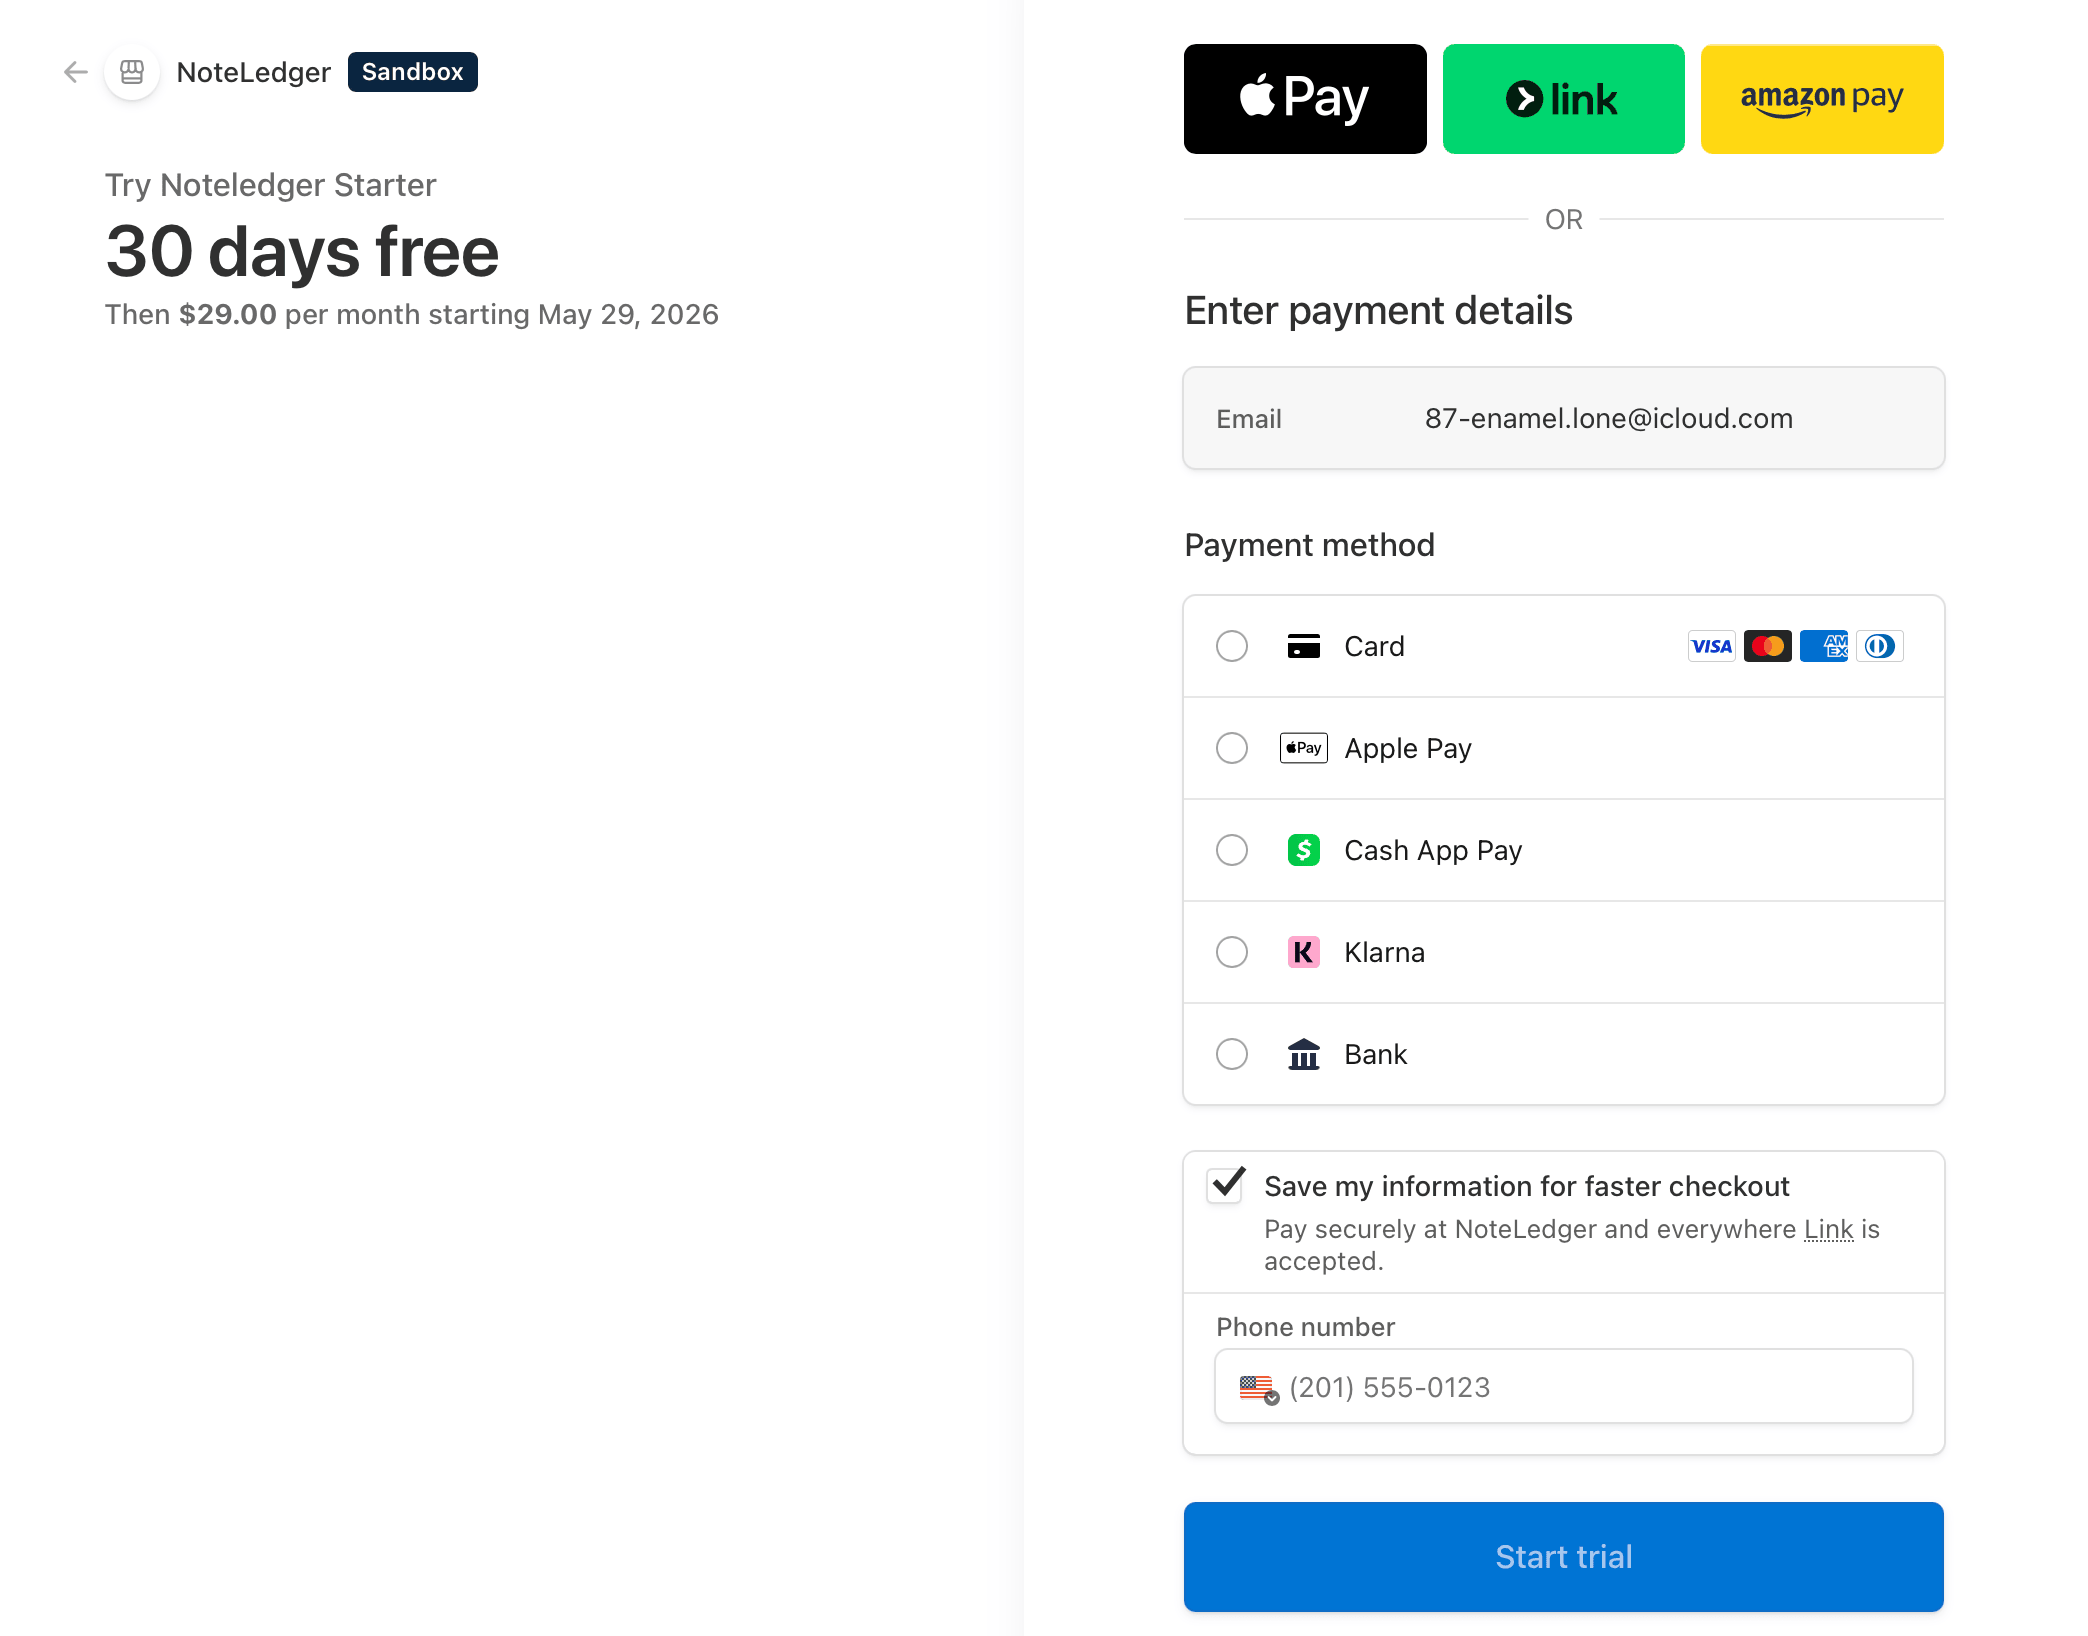
When everything looks right, click Continue to Payment. You will be redirected to Stripe to enter your card details. Your card will not be charged for 30 days.

Complete payment in Stripe
Stripe Checkout opens with the plan you selected pre-filled. Enter your card number, expiry, CVC, and billing ZIP, then submit the form. Once payment is accepted, Stripe returns you to the NoteLedger confirmation page.
Check your email and set your password
You will land on a confirmation page. NoteLedger now sends an email to the address you entered with a link to set your password.
Open that email, click the link, and choose a strong password. Once your password is saved, click the Go to Login button — or follow the link in the email directly to the login page.

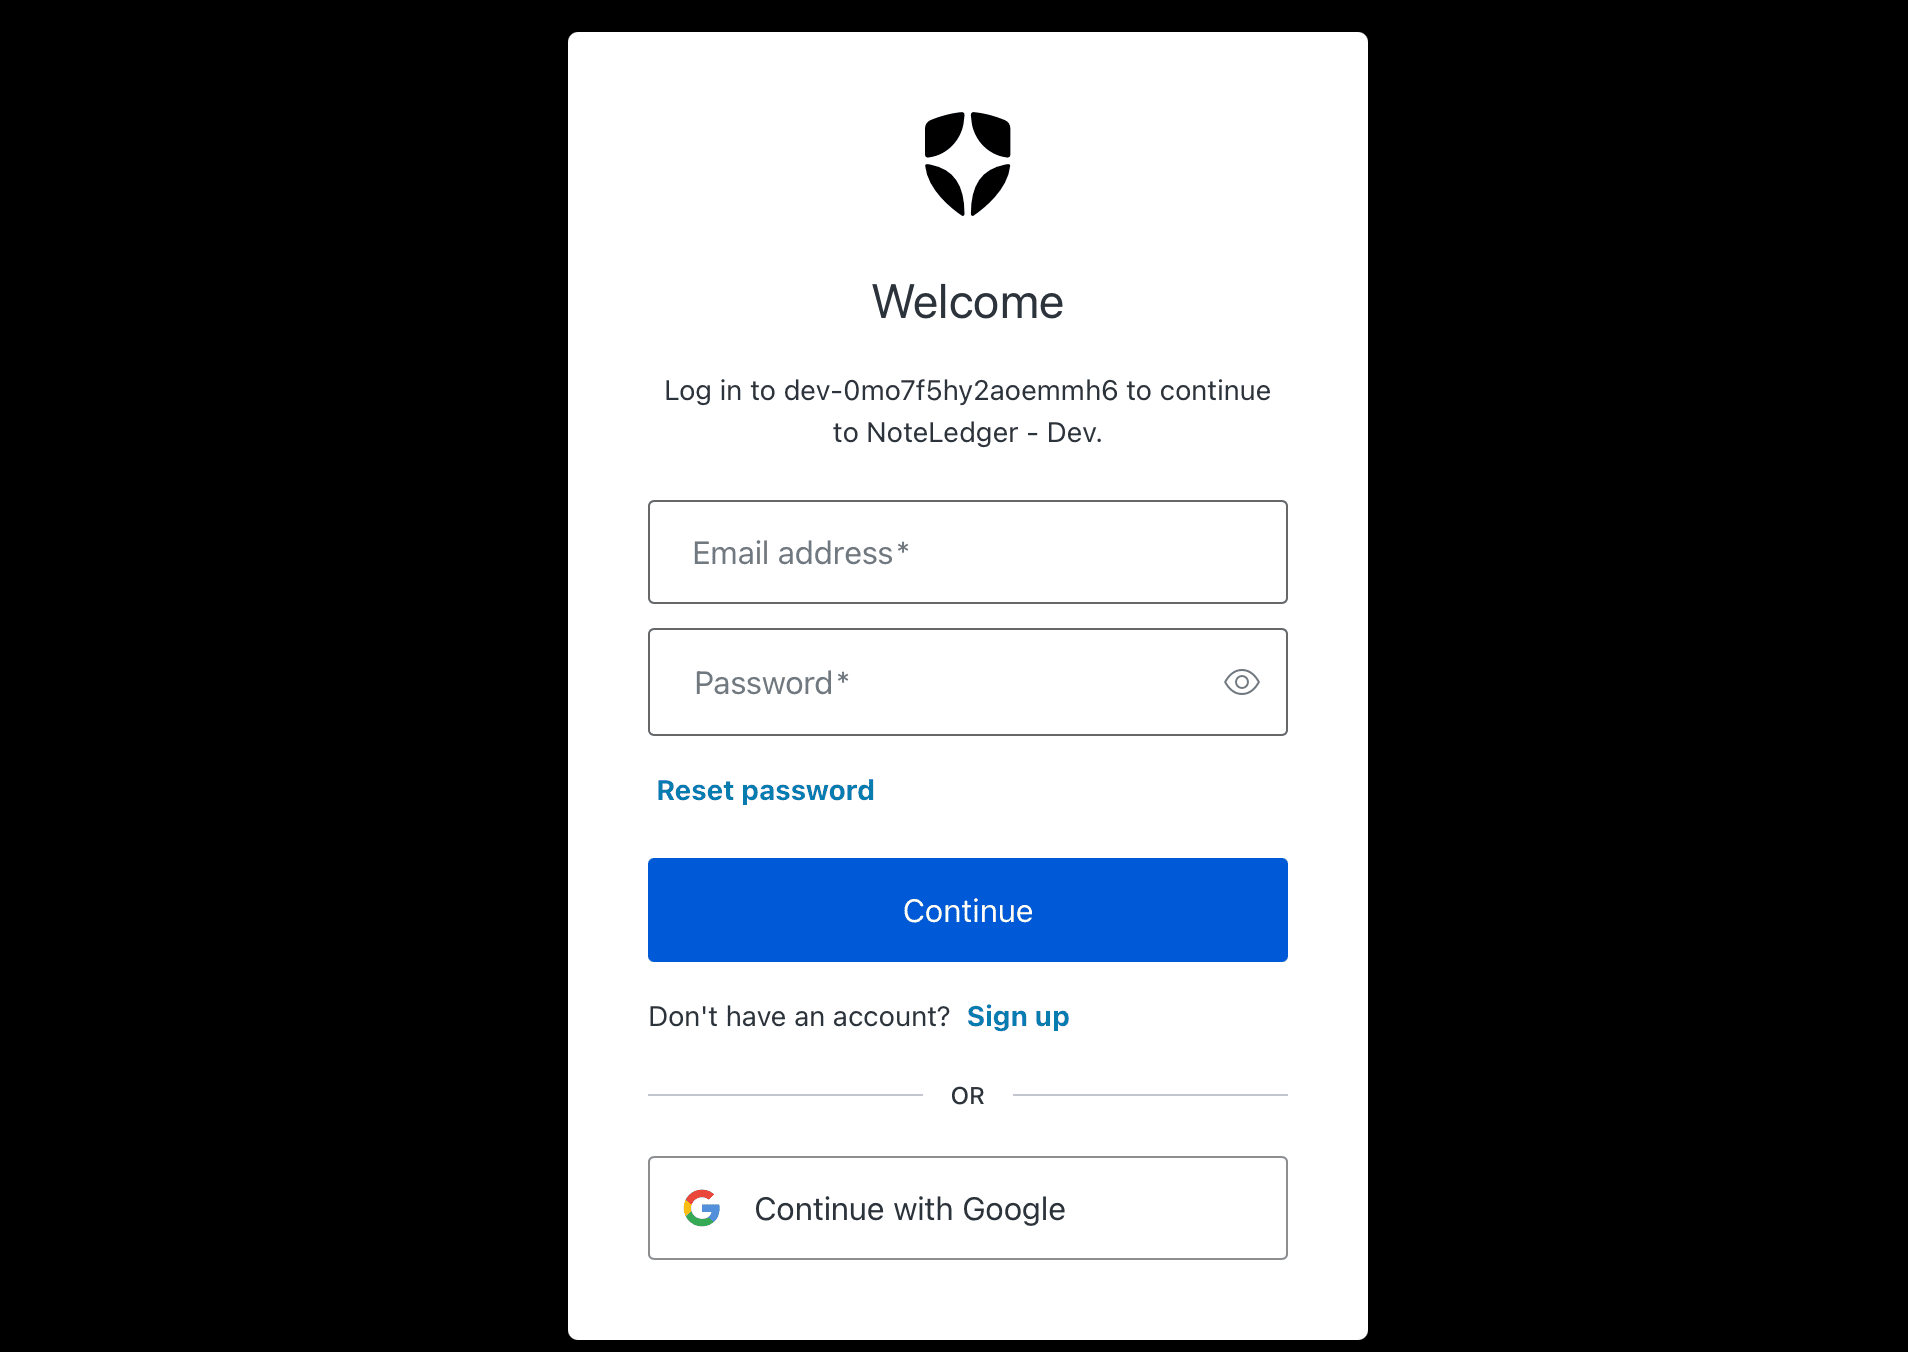
Log in to the app
On the login page, enter your email and the password you just set, then submit. After a successful login the app opens and the welcome wizard appears automatically.
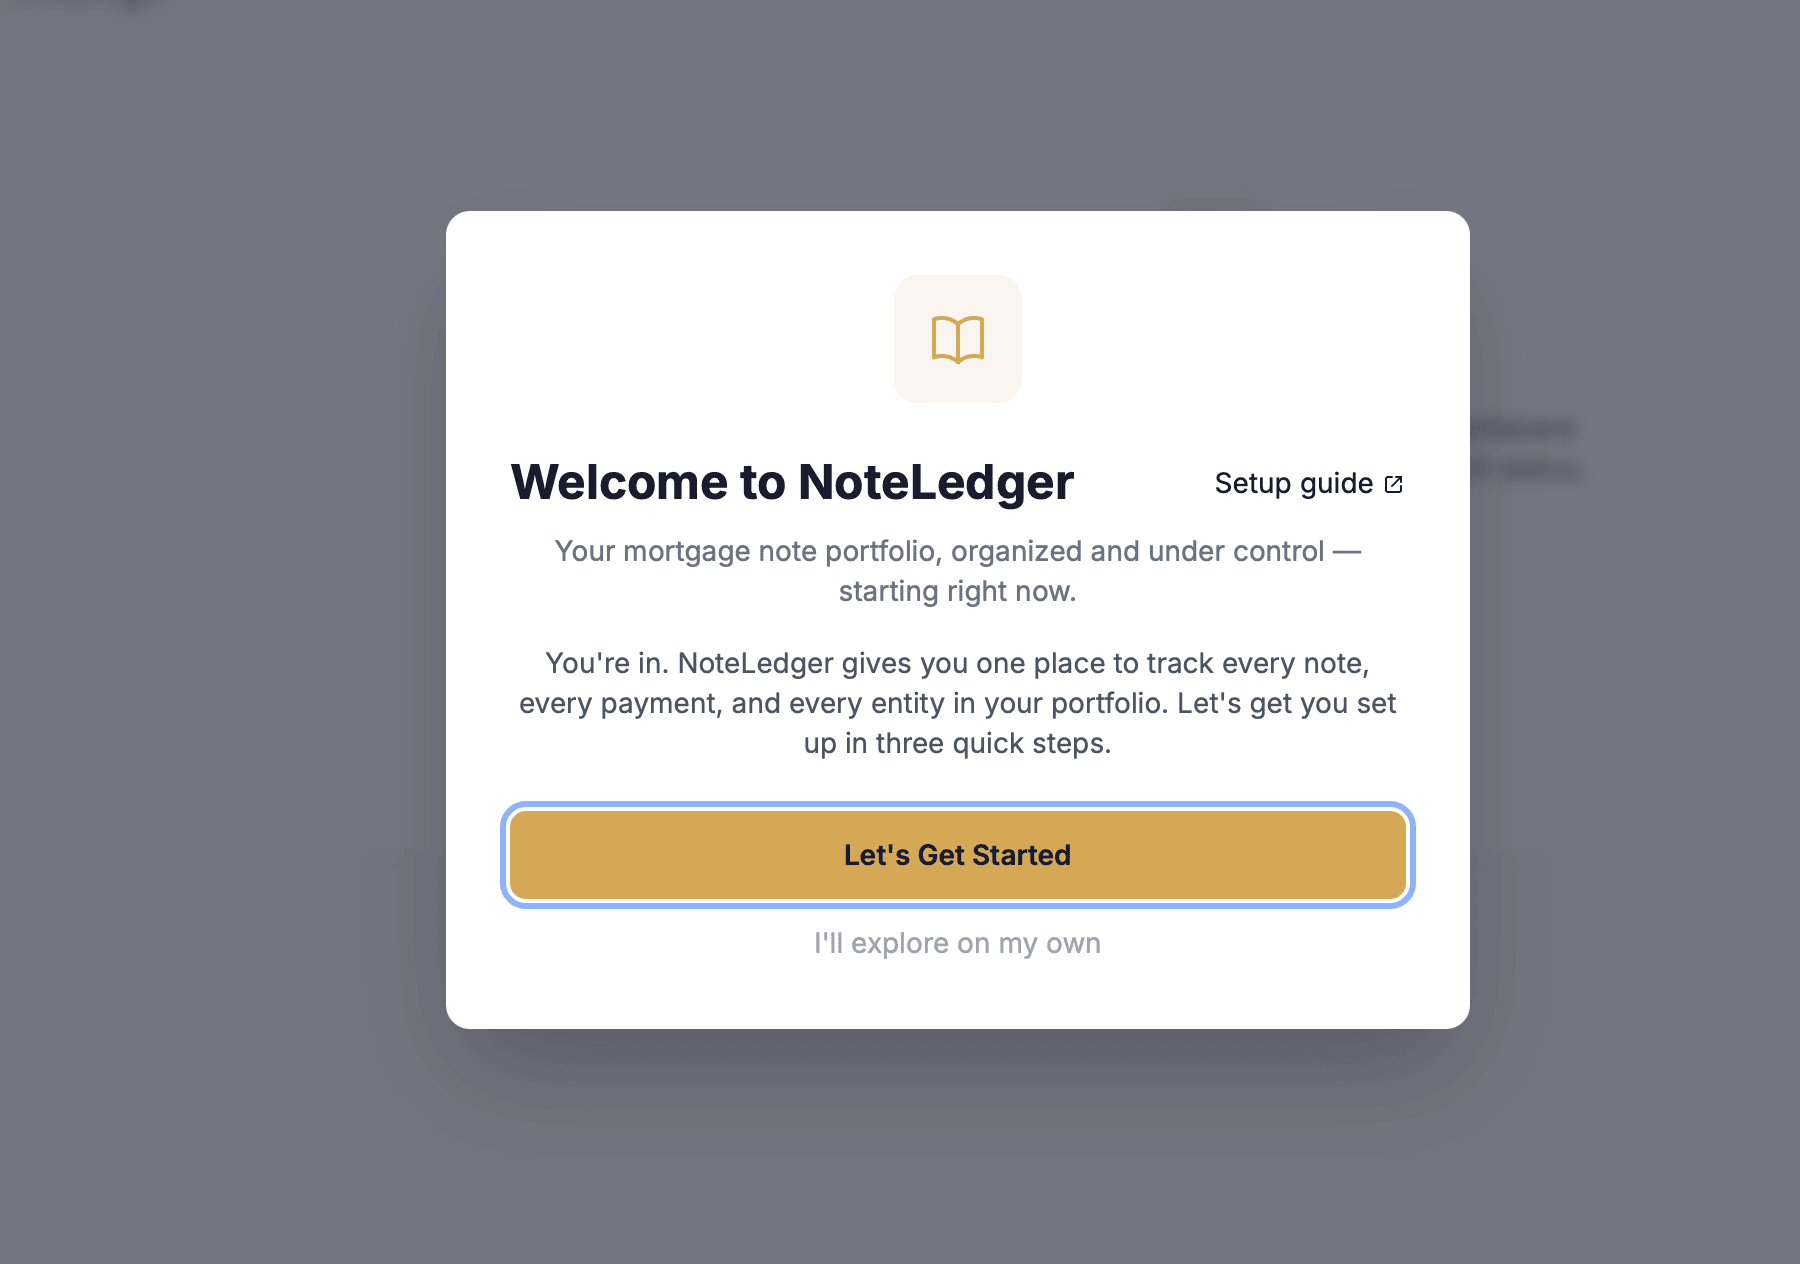
Welcome wizard — get started
The Welcome to NoteLedger dialog opens. Read the short intro — "NoteLedger gives you one place to track every note, every payment, and every entity in your portfolio" — then click Let's Get Started to move to step 1 of the wizard.
If you prefer to explore on your own, click I'll explore on my own to dismiss the wizard.
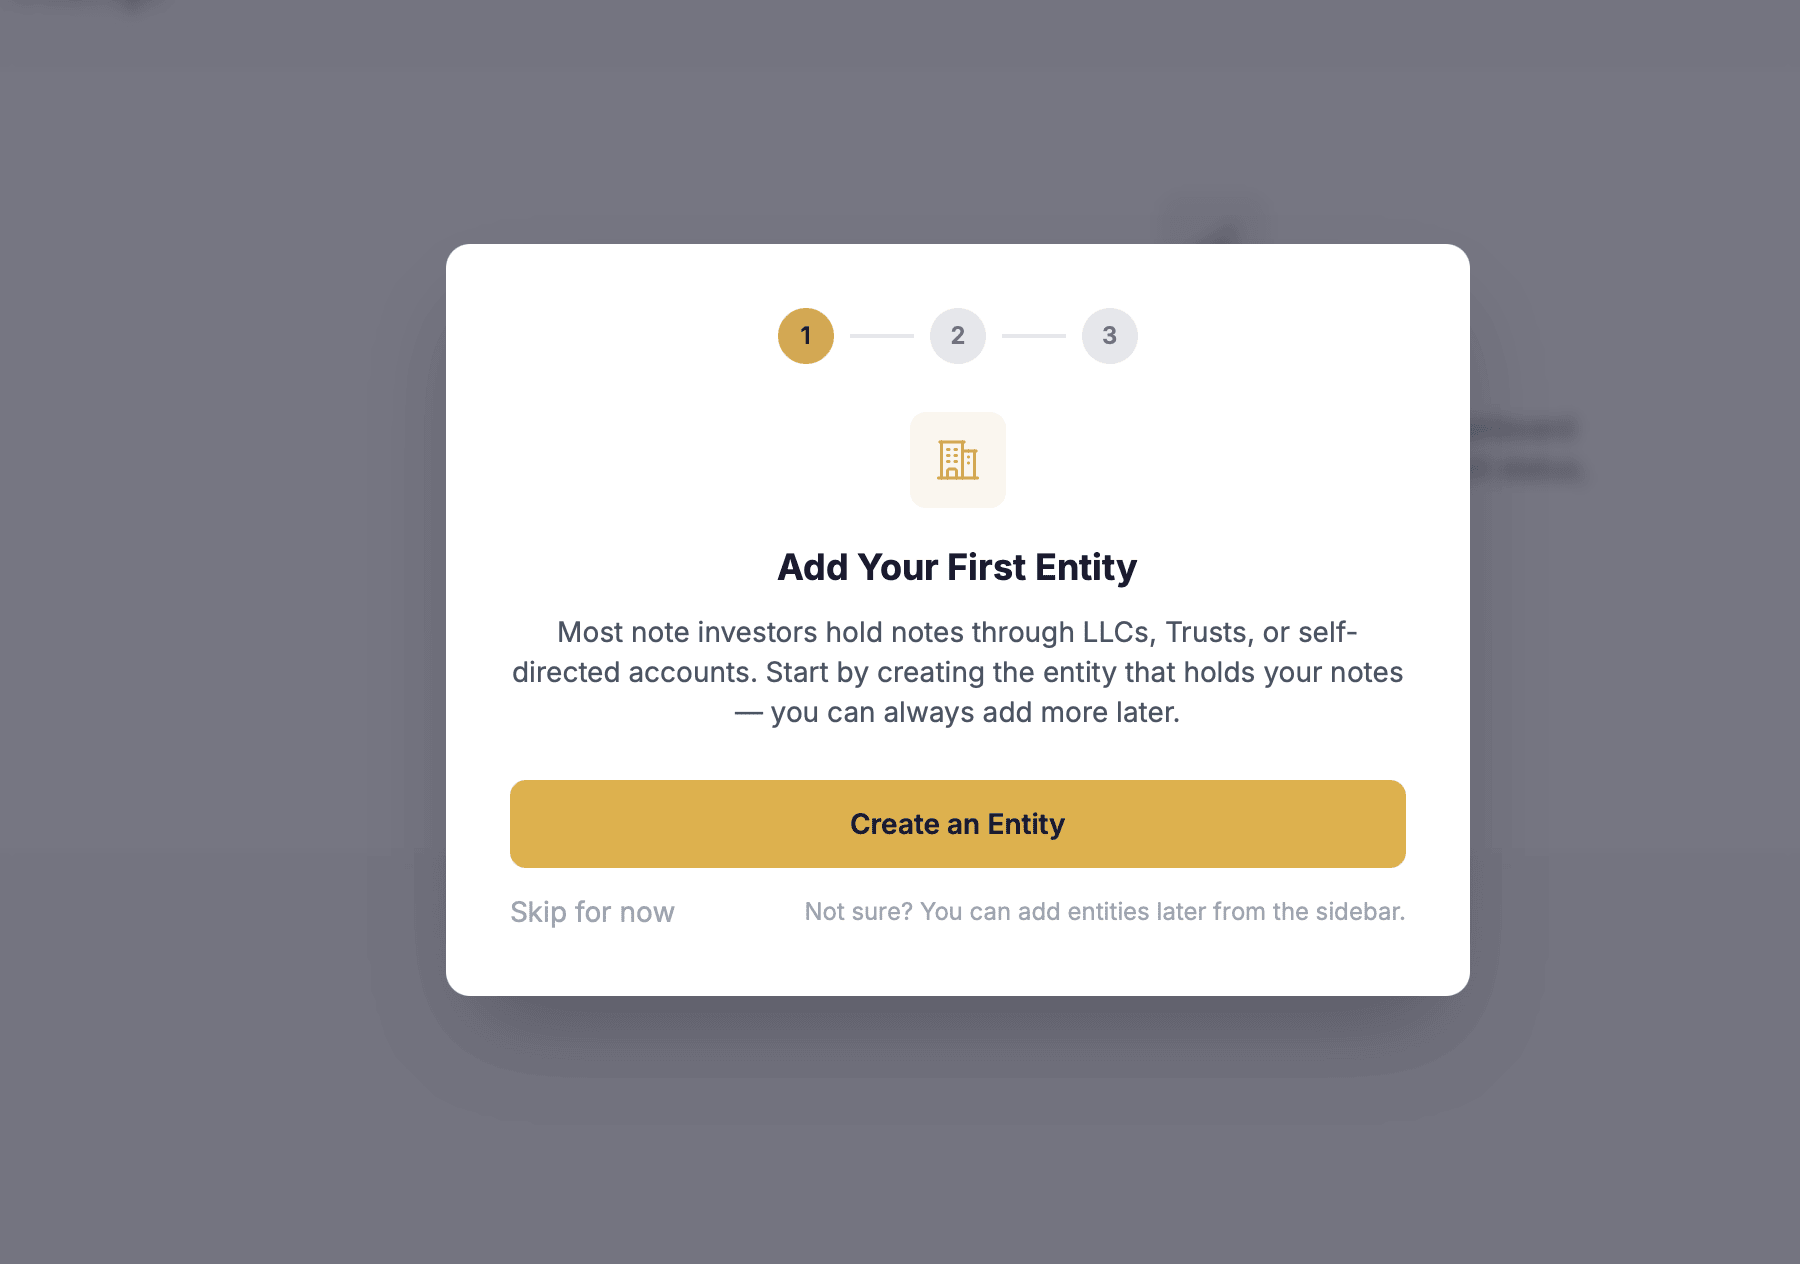
Wizard step 1 — Add your first entity
The first wizard step is Add Your First Entity. Most note investors hold notes through LLCs, trusts, or self-directed accounts. Click Create an Entity to open the new-entity form and create your first holding entity now.
If you want to come back to this later, click Skip for now — you can always add entities from the sidebar.
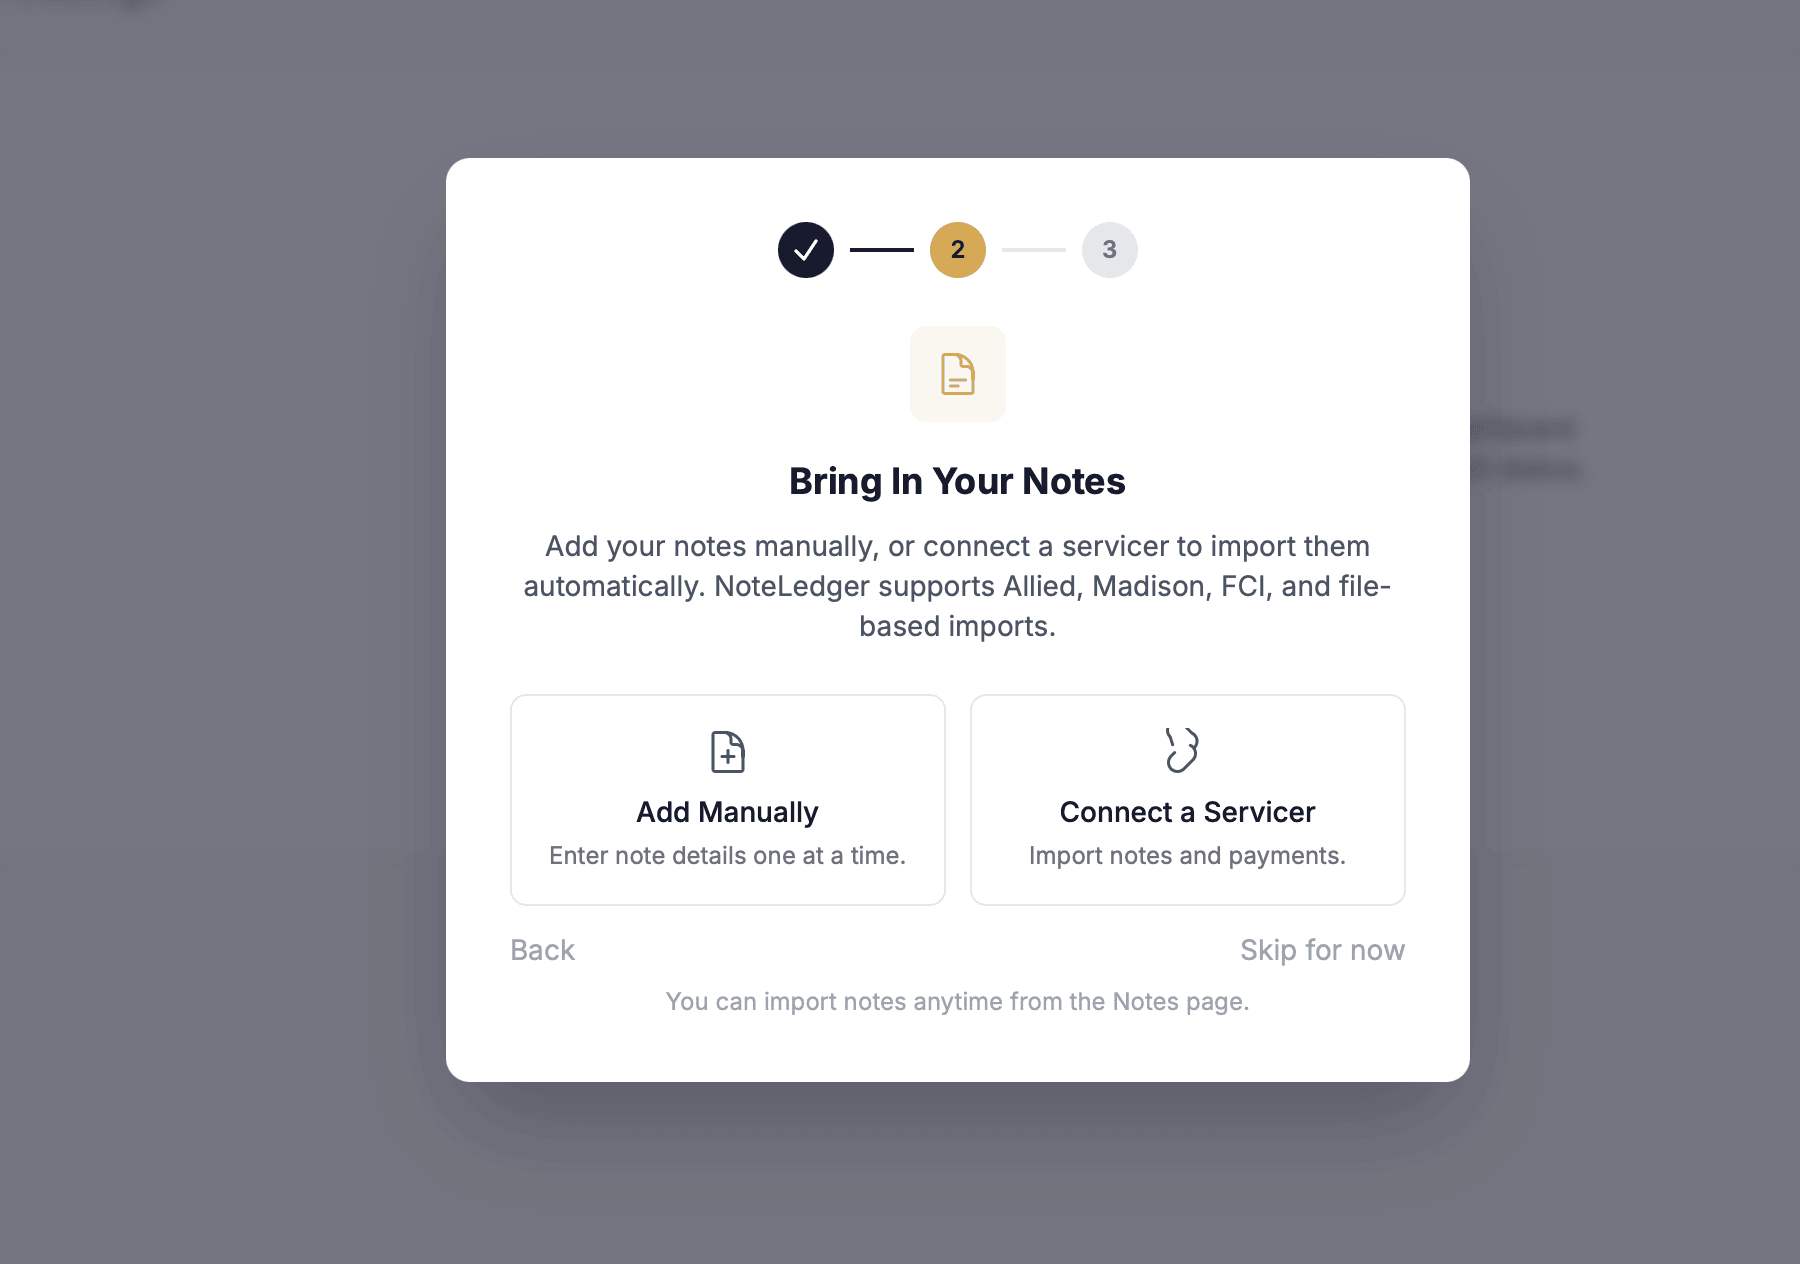
Wizard step 2 — Bring in your notes
The second wizard step is Bring In Your Notes. You have two options:
- Add Manually — enter note details one at a time
- Connect a Servicer — import notes and payments automatically from Allied, Madison, FCI, or a file-based import
Click the option that fits your workflow. You can also click Skip for now and add notes any time from the Notes page.
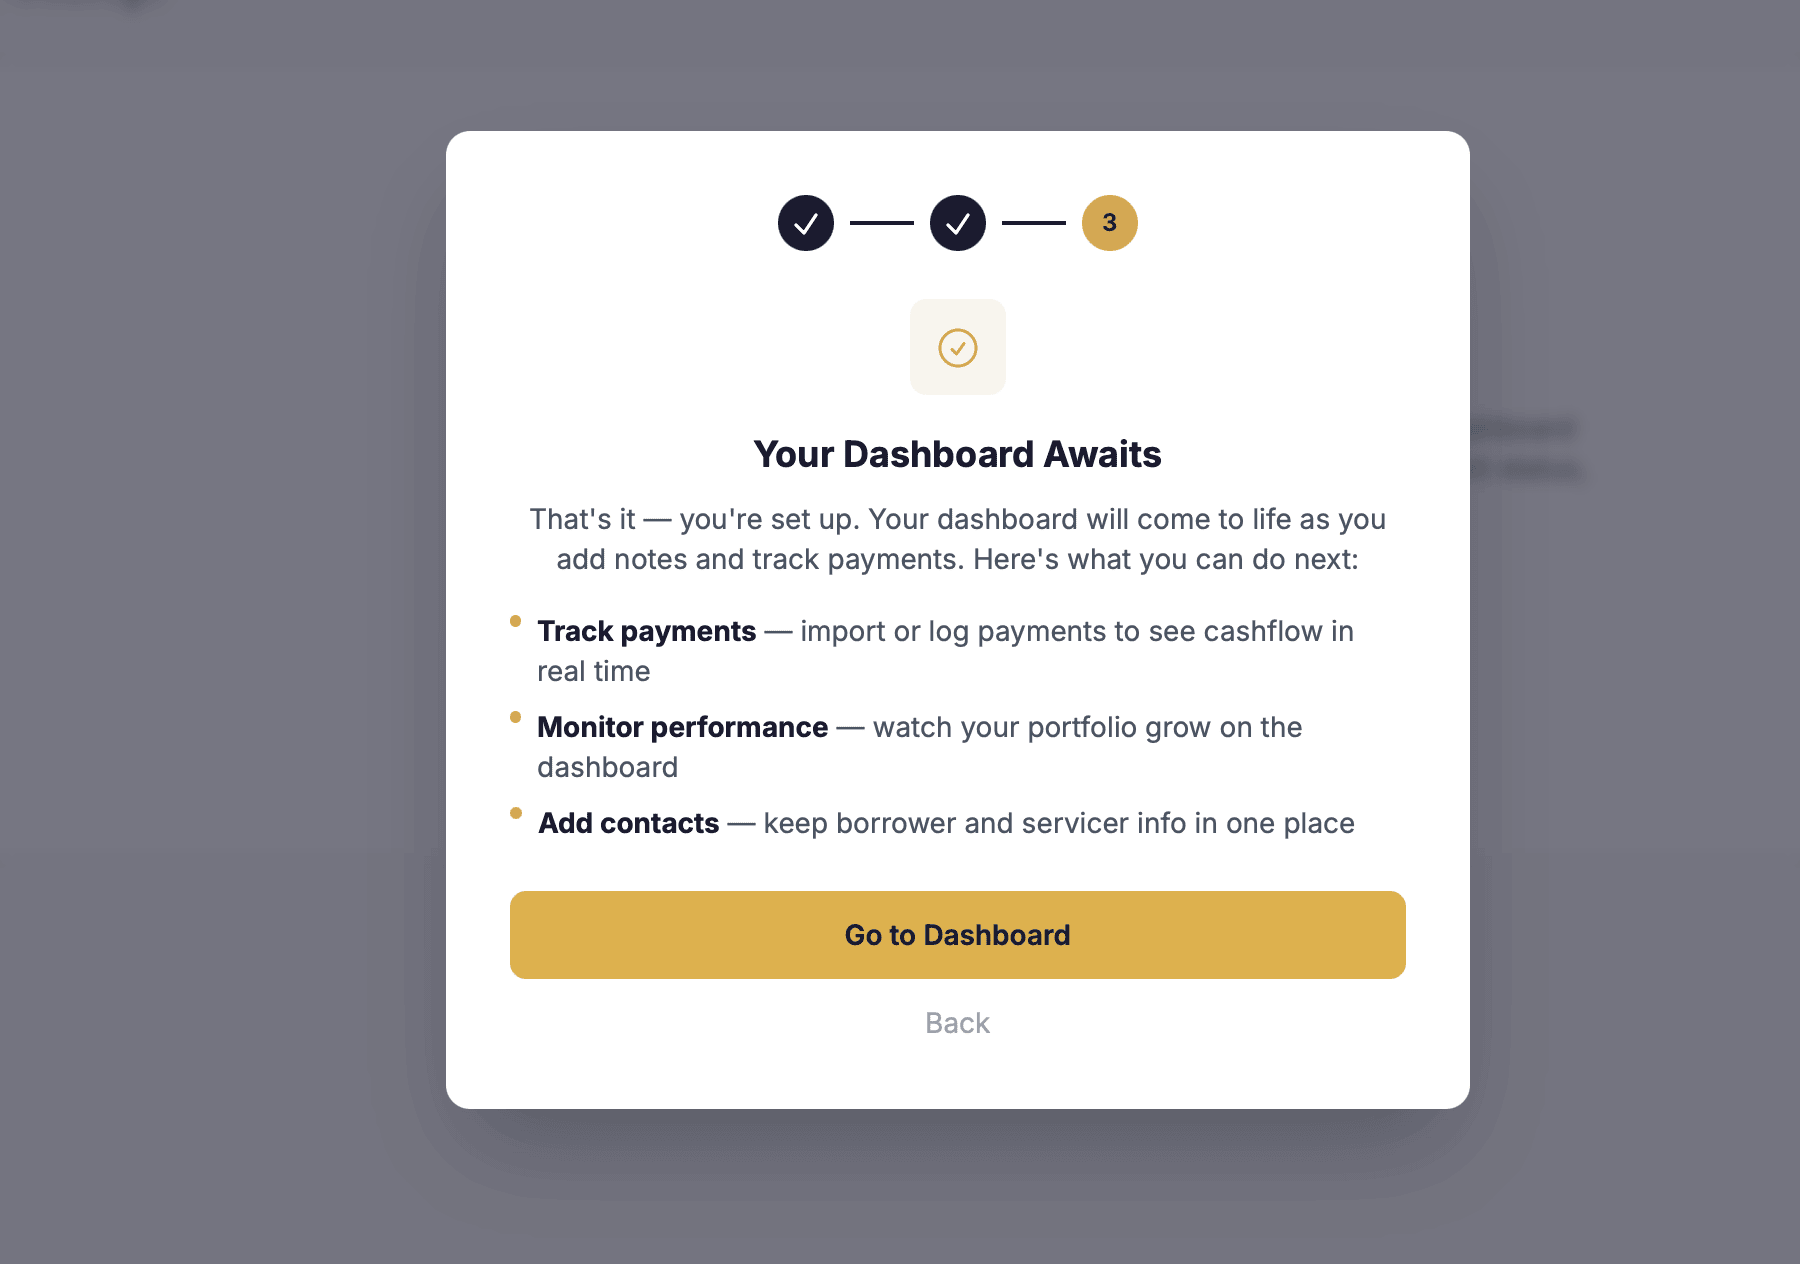
Wizard step 3 — Your dashboard awaits
The final wizard step is Your Dashboard Awaits. It summarises what you can do next: track payments, monitor performance, and add contacts.
Click Go to Dashboard to finish the wizard and open your portfolio dashboard.